Outbound Lighting Trail Evo
Quite possibly the best bicycle headlight on the market.
Outbound Lighting was founded by Matt Conte. He is an engineer with a diverse career in design, but most notably he worked on automotive lighting. His engineering background and passion for off-road rally car racing inspired the creation of the ultimate MTB and road cycling lighting.
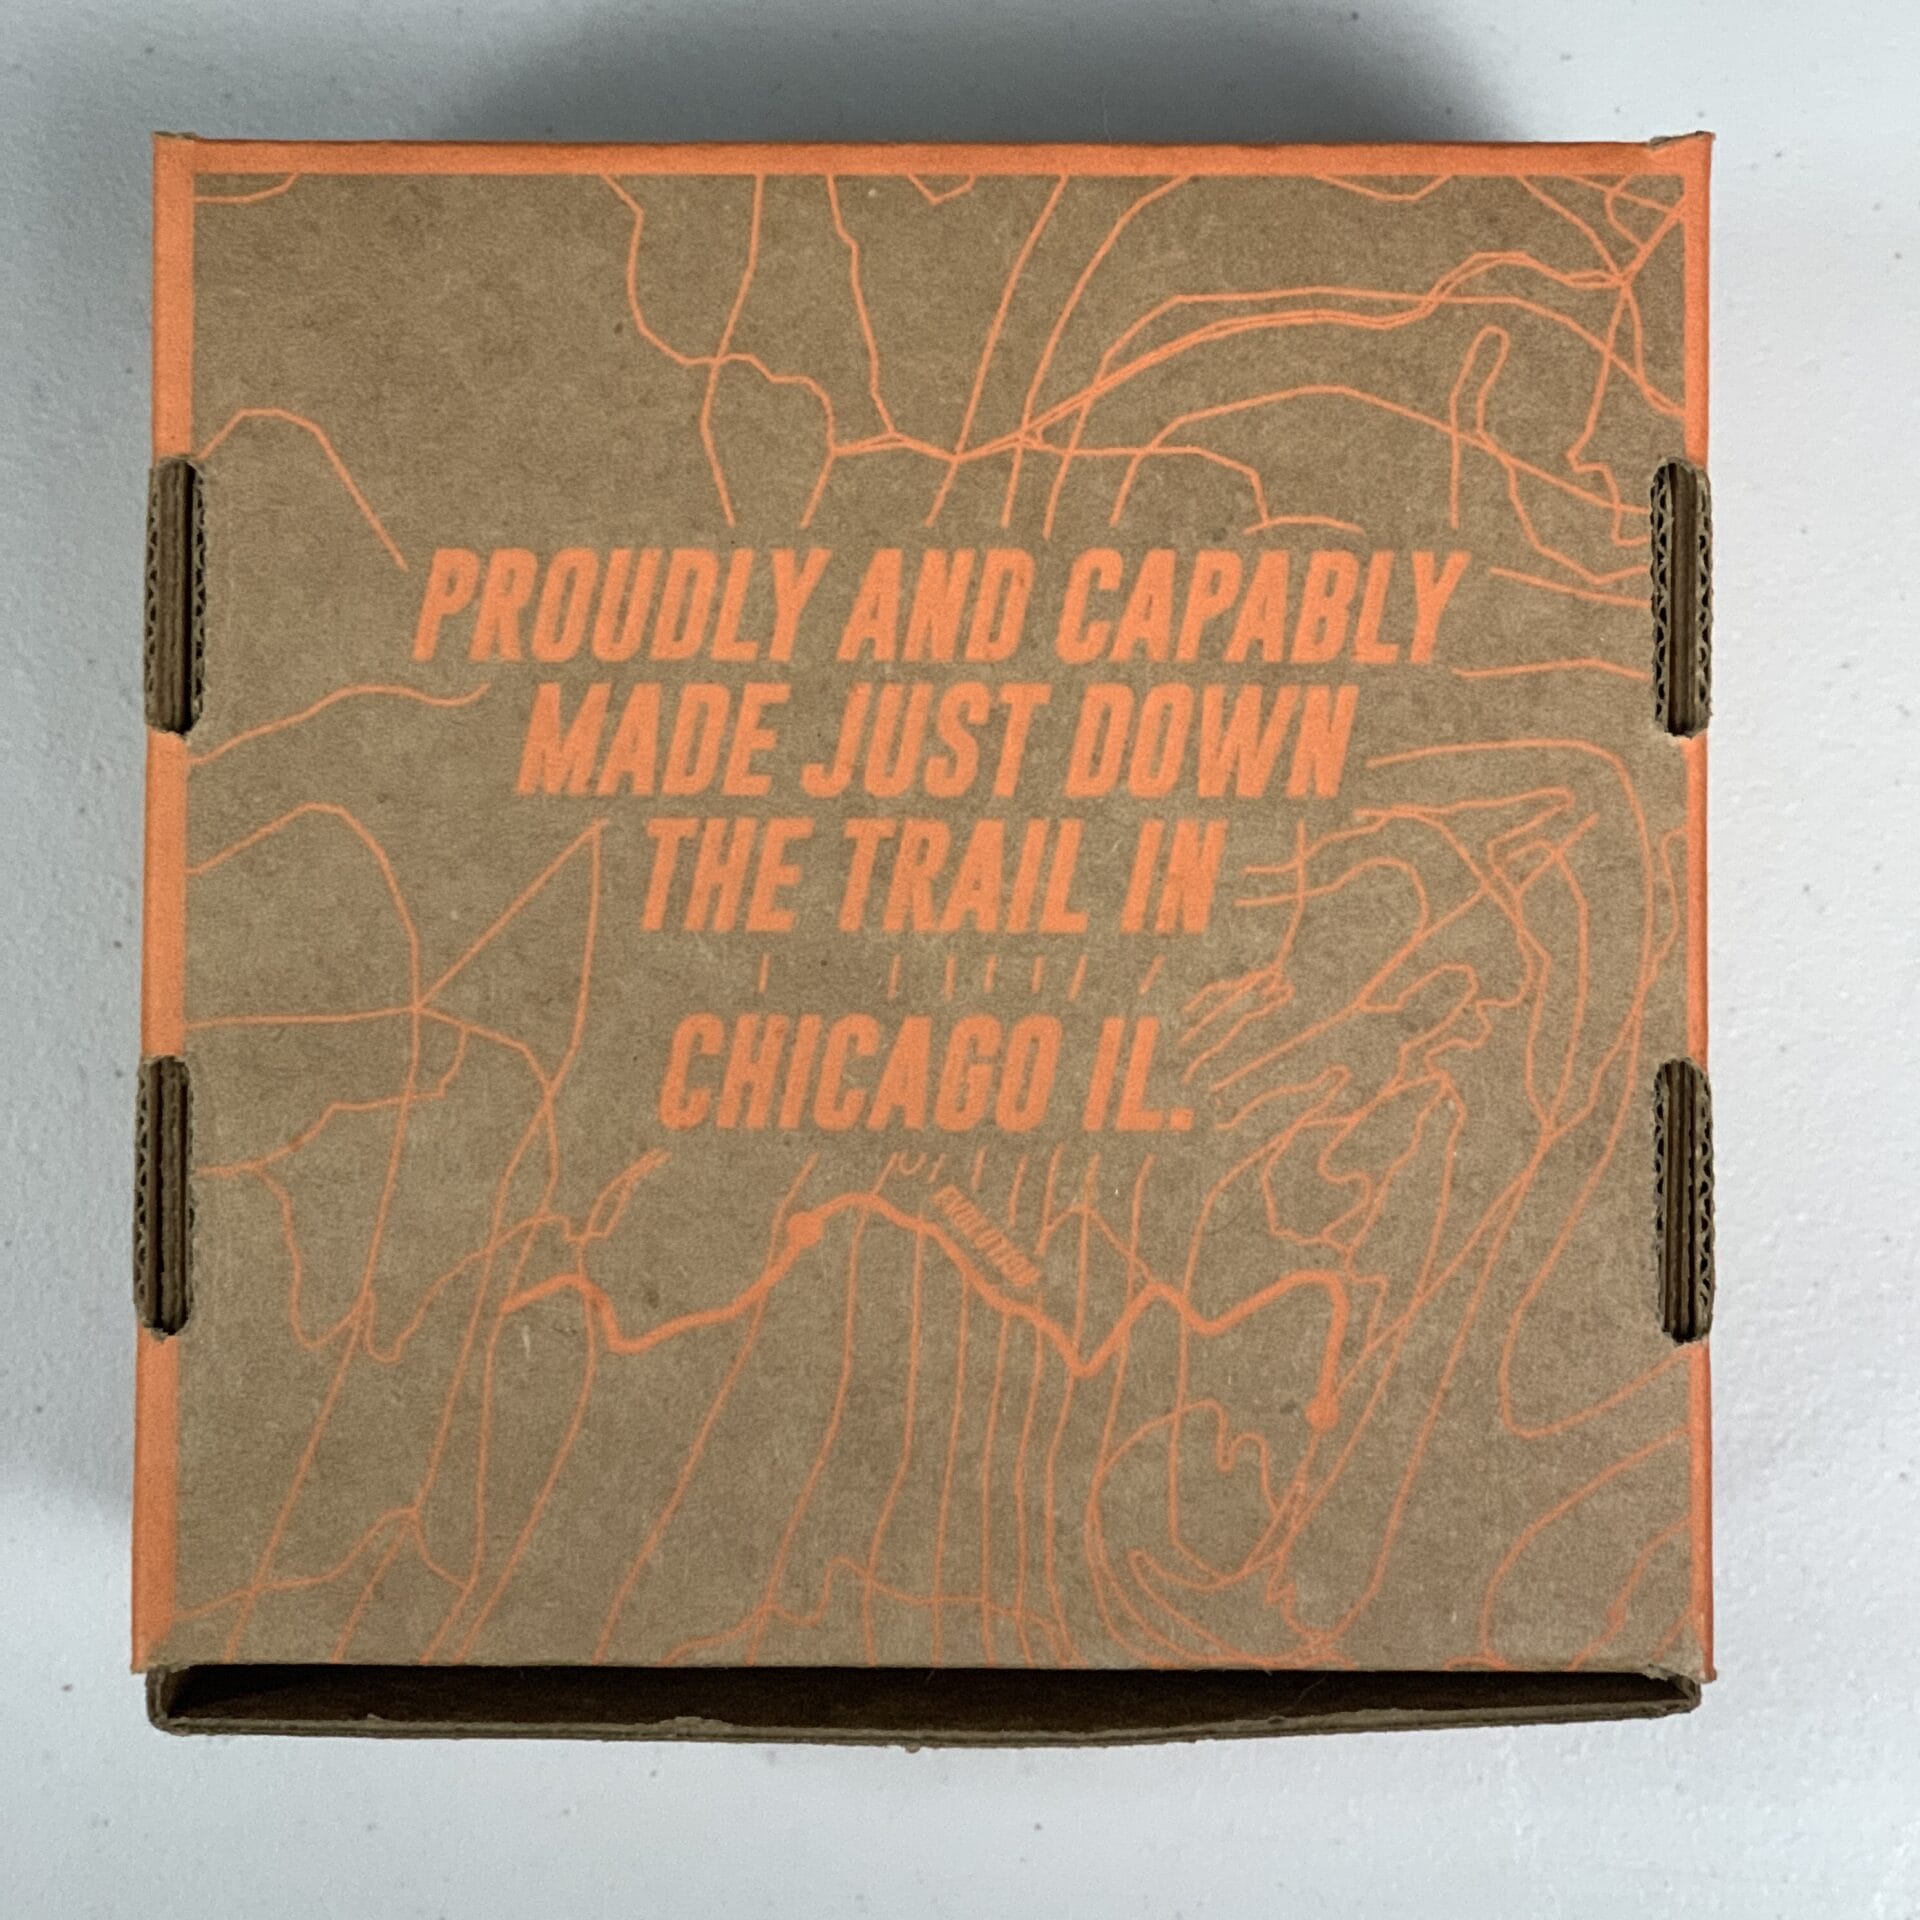
Matt, along with his co-owner Tom Place—an engineer with multiple LED chip design patents—has created a company that manufactures top-notch lights in Chicago, IL, with their first light launched in 2017.
In late 2020, the Outbound Lighting Trail Evo was released, but I purchased mine about two years after its release. So, one might wonder why I’m reviewing a light that’s five years old and that I’ve used for three years.
The answer is twofold: 1) even after five years, it remains a top-rated trail light for many reasons I’ll discuss below, and 2) after a year of planning and some initial product testing, I can finally give this light the proper review it deserves.
Since my last few light reviews, I’ve refined my methods, and now I’ve arrived at a good place to provide solid reviews with the quantitative data readers can use to determine if a light is right for them.
I reached out to Outbound Lighting with questions on the information posted on their site, and none other than Tom Place responded. If it wasn’t for his advice and guidance on setting up the testing, I wouldn’t be able to provide the reviews I’m doing today. This review is backed by NIST-calibrated equipment, industry experts, and science-backed research.
In the five years since its release, there have only been minor improvements, such as firmware updates, but it is essentially the same light still.

Don’t ask for a discount!
You aren’t getting one. Just go to their contact page, and you’ll find it explicitly stated. If you’re looking for the best deal on the light, once a year for Black Friday, you’ll find the lowest price on these lights.
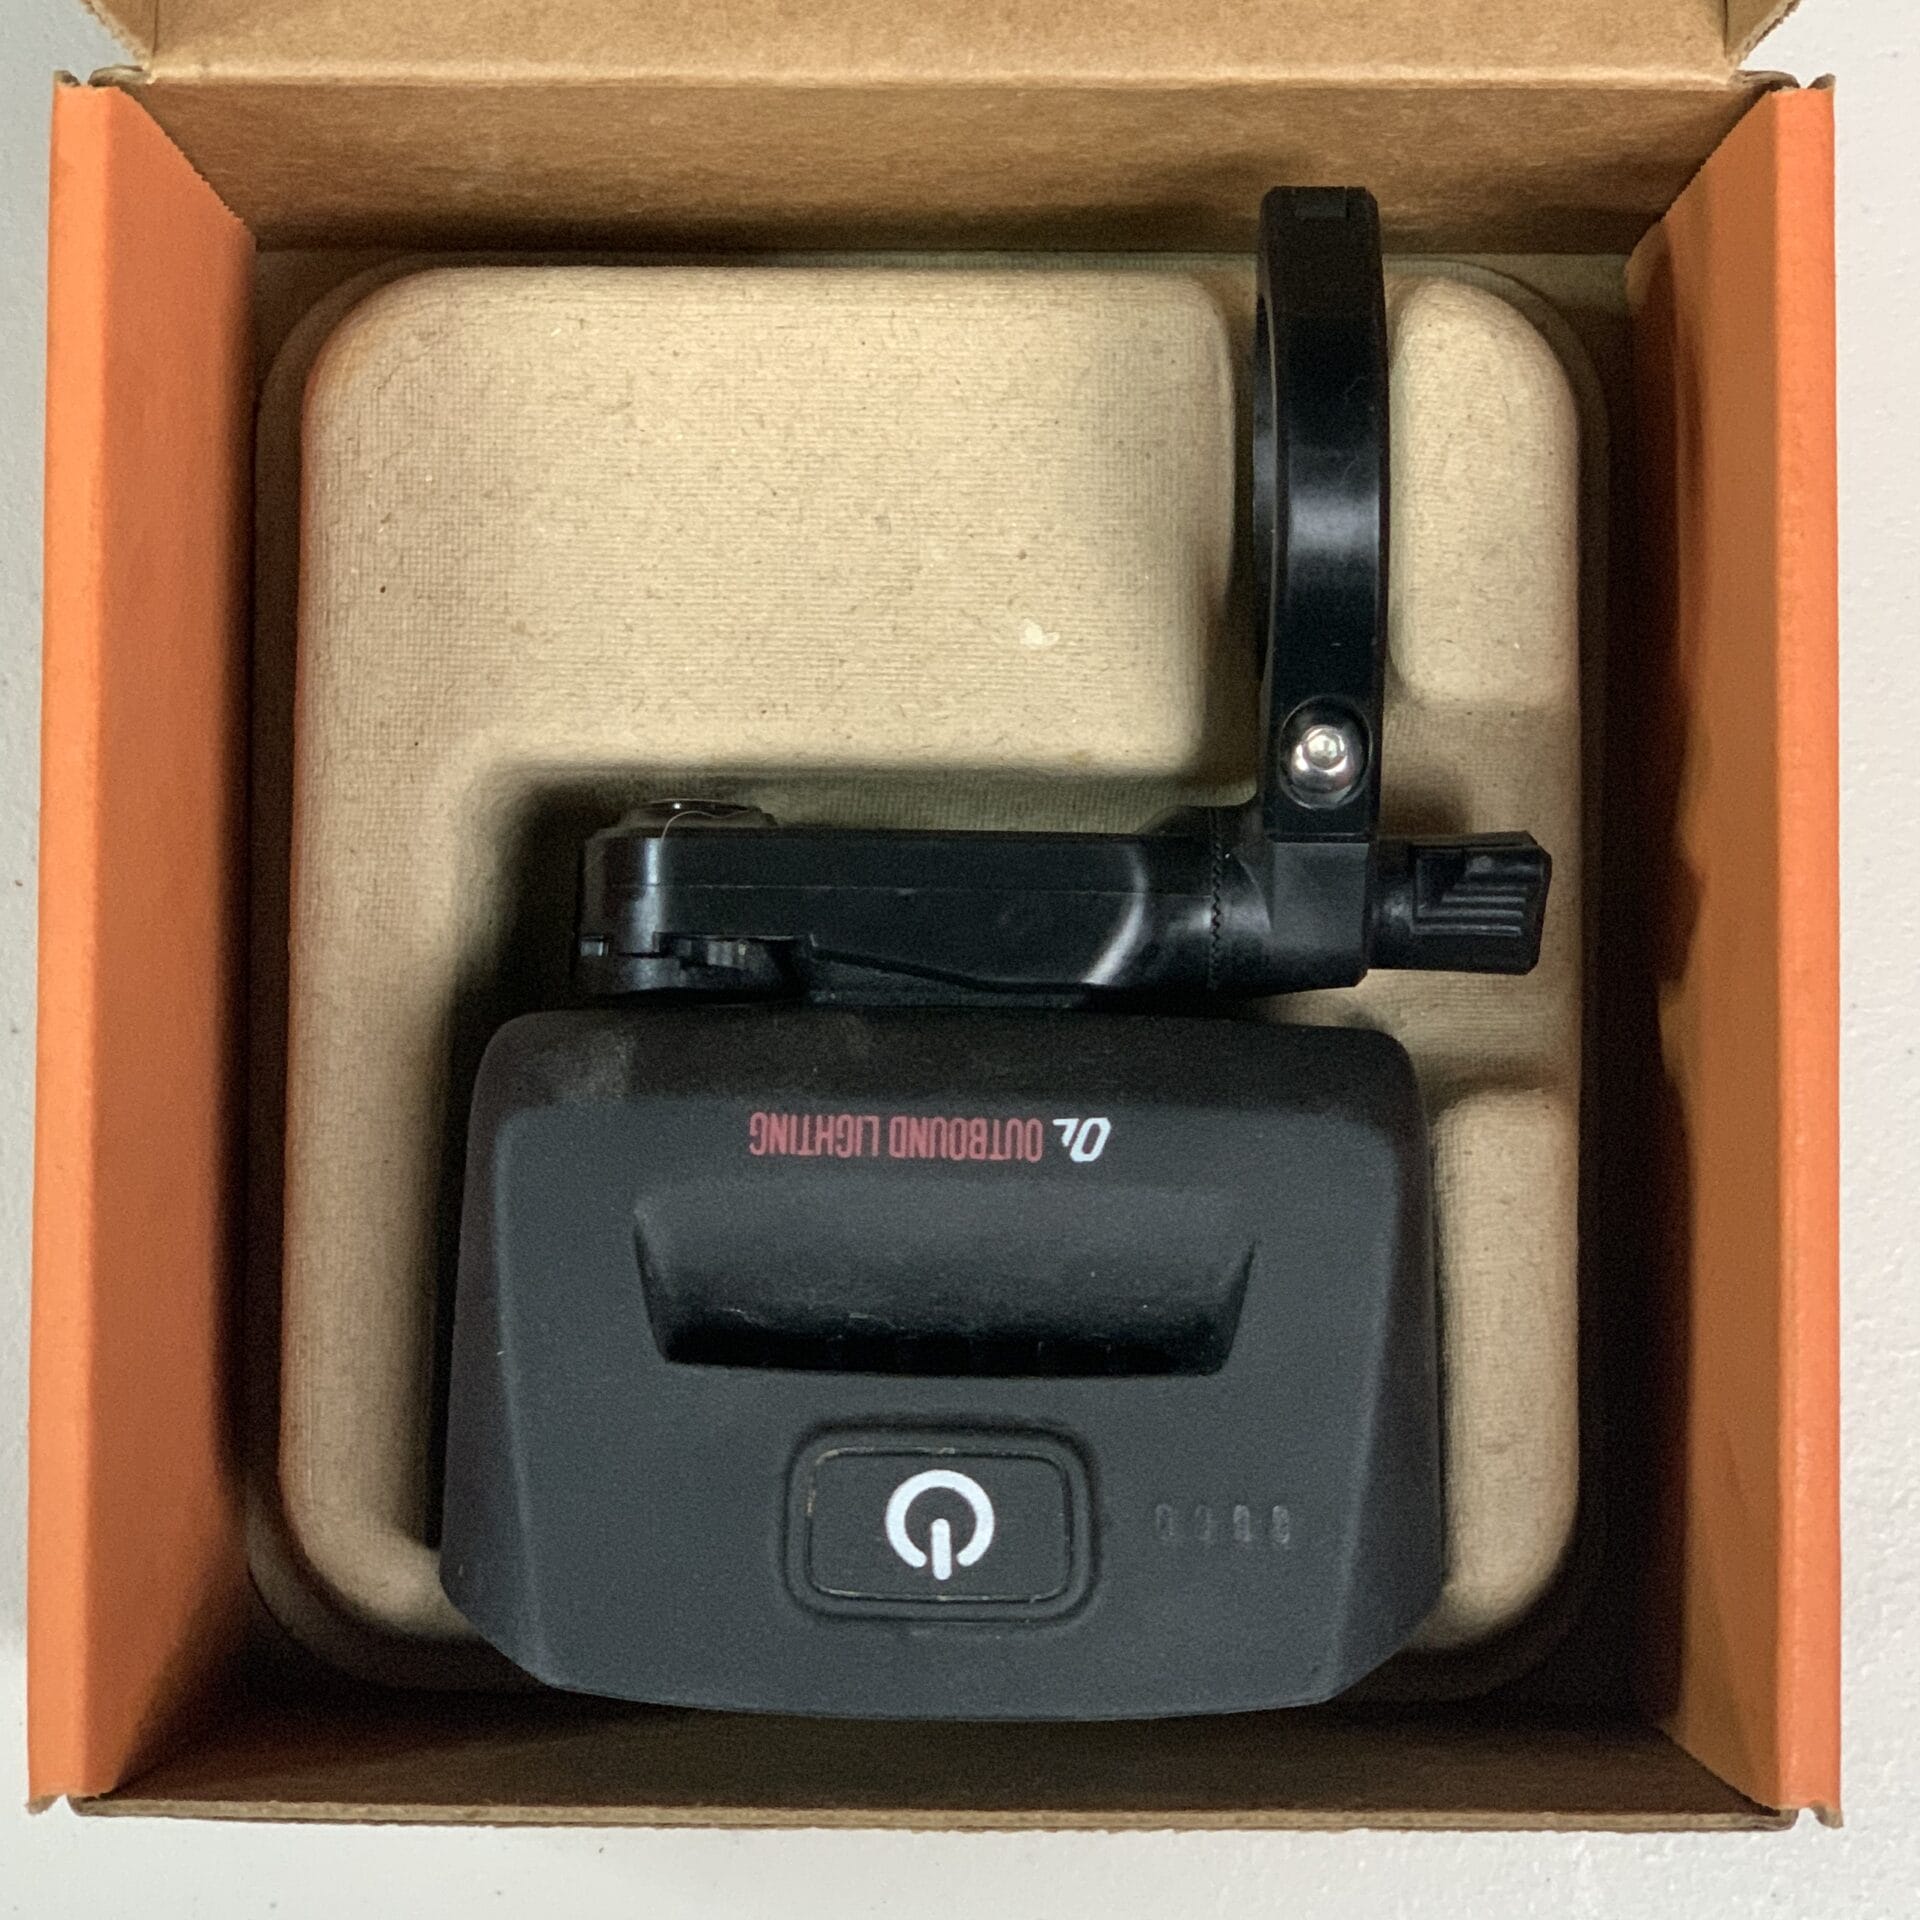
Unboxing
Opening the box, you find the Outbound Lighting Trail Evo light with the handlebar mount connected to the light. Underneath the cardboard packaging, there is a USB-A to USB-C charging cable, a shim for the Quick-Release Bar Mount, a 2.5 mm hex wrench, and an instructions manual.
Sold separately are 22.2 mm and 25.4 mm shims, USB-A to USB-A charge cable, the Evo Cable Manager, and the Action Camera Quick Release Mount. I purchased both the Action Camera QR Mount and the Evo Cable Manager.
Prices as of Late 2025
- Trail Evo Light – $245
- Trail Evo Downhill Package – $375 (Evo & Hangover)
- Action Camera QR Mount – $14
- USB-C to USB-C Cable – $5
- Evo Cable Manager – $12
It seems like the price of the light has remained steady. I purchased mine with their Black Friday deal in 2022 and paid $220 for the Outbound Lighting Trail Evo, and the accessories are still the same price.


The Light
The Trail Evo
The Outbound Lighting Trail Evo bike light is designed to be a handlebar-mounted light. The nine LEDs are placed in a way to create a beam pattern that is wide and will evenly light up the trail. The Trail Evo is an evolution of the original Trail Edition from 2017, but now longer-lasting, brighter, and with a wider beam pattern—all within a single unit.
The Outbound Lighting Trail Evo has advanced optical engineering incorporated into the design. They use high-tech software for simulating the light to achieve their desired lighting goals. There are a lot of high-level things going on that probably require a good understanding of electrical and mechanical engineering.
Simply put, this light is bright, and the beam pattern is perfect for trail riding.
But the brightness and beam are only part of the story. The beauty of this light lies beyond just some strong LEDs and a big battery. The Outbound Lighting Trail Evo uses an LED driver designed to operate at 92% efficiency, which provides stable power output and maintains a constant output for the entire discharge cycle.
The benefit of modern-day Li-ion batteries is that they can provide full power deep into their discharge, unlike older alkaline cells. Thus, the true benefit of modern lighting, if made properly, is to maintain a constant light intensity through the duration of the cycle.
Specs
- Lumens ~2200
- Battery: 10000 mAh – 2 LG 21700 M50LT cells
- Mass: 275 g (light only), 36 g (quick release mount)
- Materials: Magnesium, Glass Fiber Reinf. Nylon (mount), polycarbonate, TPU, PMMA
Air-cooling
Having an automotive background, it is expected that this light would incorporate proven technologies from that industry. One such inclusion is pass-through air cooling (a bike industry first). The Trail Evo has an air scoop underneath the light that collects the air and directs it through the body of the light, where it’s released out of the top.
Inside the light, there are heat sink fins to provide a larger surface area to better dissipate the heat as air flows over the fins. This is how Outbound Lighting has thermally engineered their light to keep it cool while riding.


FL-1 Ratings are BS
ANSI/PLATO FL-1 standard was formalized in 2009 to standardize how manufacturers test and report their light performance. Though this standard is for flashlights, not bike headlights. Also, this standard was developed before Li-ion batteries were standard and LEDs were in common use.
For the FL-1 test, the max lumens are determined by the brightness when the light output has dropped 10% of the initial output (the first 30 seconds aren’t included in the test to allow for LED stability). This 10% decay can happen 2 minutes in or 2 hours in, and the lights will still have the same lumen rating, even if light one has dropped to half for the remainder of the test.
Manufacturers are required to publish their data, but Outbound Lighting does, and I am compiling a database for all my light tests for quantitative data comparisons.
Runtimes is another issue that is handled poorly in FL-1. There isn’t a cutoff percent of light output or some other clearly defined way to standardize runtime claims. Unlike other companies, Outbound Lighting publishes their runtimes as the initial drop-off of light intensity, even though the lights continue to run.
Outbound publishes this data on their product page. This gives users a clear understanding of the light performance over time, and these graphs are the basis for the graphs I have created below.
If you are trying to find a lumens rating on these lights, you aren’t going to find it front and center because that isn’t their main selling point. In the specifications section, you will find an approximate rating, which is quite impressive: ~2200 lumens.

Outbound Warranty
Outbound Lighting states that customers shouldn’t have to pay money to keep their light running for 3 years. This to me means that you are covered for at least 3 years if anything goes wrong. Beyond the three years, there is a free lifetime extension, but they ask that you be honest with them.
I have not used the warranty, but Outbound Lighting has posted images on their socials of damaged lights that were beyond normal use. They worked with the customers to get their lights repaired.
I have emailed Outbound Lighting, and they have always responded quickly. Their customer service is great!
Light Modes
The Outbound Lighting Trail Evo has four constant light modes and two flash modes. The main constants are High, Medium, and Low, which are straightforward. If High is 100% output, medium is approximately 65% of max output, and low is about 37% output, based on their runtime charts.
For the flash modes, there are Daytime Strobe and Nighttime Flash. The daytime mode has a slow pulse that flashes multiple times then stays constant. The nighttime mode has a rapid flash then a constant light in between flashes.
There is no lockout mode on the Outbound Lighting Trail Evo.
When the light is turned on, a single green light will turn on to indicate the light mode. By default, the light turns on to Adaptive mode. After a few seconds of being on, the green lights will switch to battery level status. As you scroll through the different modes, the mode status light will change too.
The furthest right light is Adaptive, second to right is High, second to left is Medium, and the left light is Low. The two outer lights on indicate Daytime Strobe, and the two inner lights indicate Nighttime Flash.


Charging/Discharging
Use the provided USB cable to charge the light. The light will charge up to 85% within 3 hours, then taper to a trickle charge as it finishes. The opening around the charge port is relatively small, so a lot of USB cables won’t fit into the port.
The Outbound Lighting Trail Evo is capable of Quick Charge with 3.0 A chargers. When plugging the light in, the charge indication light will flash rapidly if Quick Charge is enabled.
When the light is fully charged, the 4 green lights will remain on.
As the light discharges, the battery level status lights will change too, dropping from left to right. Fully charged is all 4 lights, three lights is 75%, two lights is 50%, one light is 25%, one light slowly flashing is 5%, and one light rapidly flashing is 2%.
Before the light dies, the main beam will flash for 10 seconds, letting you know it is about to shut off. This flashing period should give you time to slow down and stop safely.
Pass-Through Charging
Another interesting feature the Outbound Lighting Trail Evo has is pass-through charging. This allows the light to be charged while in use. Plug the light into a power bank with QC3.0 specifications capable of 3.0 A output at 5 V, then go ride. It is suggested to plug the light into the power bank at the start of your ride if you need the extended runtime; waiting could lead to some light modes not being available.
Though I have yet to use this feature, it could be beneficial for long rides in the dark or 24-hour races. This allows you to easily get a power bank to recharge your light, and you aren’t beholden to a light manufacturer’s proprietary battery.
The Trail Evo is an all-in-one light, but combined with a power bank, you can light the way for quite a long time.


Light Interface
The Outbound Lighting Trail Evo is very easy to use, with a single button on the top of the light to control the features. Press the power button to turn the light on. Continue to press the power button to scroll through the light modes.
To get to the flashing/strobe modes, with the light off, press and hold the power button for 3 seconds. Then press the power button to switch to the next mode.
Mounting
Another proprietary mount! Outbound Lighting has decided to create its own mounting system with a rectangular interface with tapered edges (which OL calls a foot) on the back of the light that locks into the “shoe,” the glass fiber reinforced nylon mount. The shoe is a locking cam that rotates to lock the light in. The light makes a click when the cam shuts but push lightly on the lever to ensure it is fully secured.
The provided mount is a clamp-on style mount for 35.0 mm diameter handlebars and comes with a shim for 31.8 mm diameter bars. With the clamp installed onto the bars (M2.5 Allen wrench provided), there is a secondary pivot point on the mount to refine the angle of the mount. This is adjusted with a thumb knob.
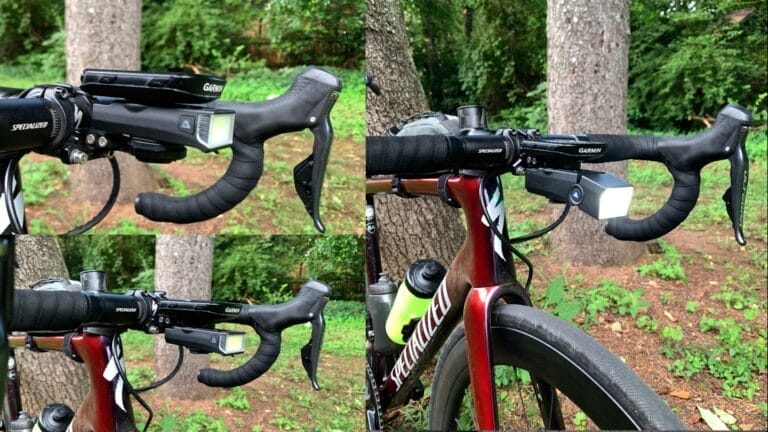
In my three years of owning the light, I have never used the provided mount. I have an out-front mount with a GoPro attachment on the bottom. Therefore, I have always used the Action Camera QR Mount. I have seen people on the trail using them, and I haven’t heard any complaints about it, so I won’t be commenting on the mount.
The Action Camera QR Mount has worked perfectly. I do like how easy it is to take the light on and off, and the light stays securely mounted, even on the roughest trails.
To install the light onto the mount, angle the foot of the light into the side of the mount opposite of the cam (make sure the lever is up and the brass plunger is extended outwards). Press the light back into the plunger until the cam-lock lever releases.
The good thing about this mount is that it can be installed upside down or right side up, and the light can still be installed right side up. That way, the beam is always properly oriented no matter how the mount is installed.

Initial Thoughts
As mentioned previously, I have had the Outbound Lighting Trail Evo light for years, and I have used it for gravel, road, and MTB riding. I have used it alone and in combination with other lights. Therefore, my initial thoughts are a bit biased in the sense that at the time of this writing, I have already used the light before noting my thoughts.
If I take a step back and look at it through the eyes of a new user, one will notice the solid construction. The light just looks and feels well-made and appears to be very high quality. The topside of the light is wrapped with a rubbery TPU material and just gives the light a nice feel; it should protect it from drops, etc. The bottom side is the aluminum housing.
The light might seem a bit large at first, but considering it has 9 LEDs, all the circuitry, and the batteries wrapped in a single unit, it is quite small. The Outbound Lighting Trail Evo main body is broad compared to other lights, but I’m sure its was optimized for the desired beam pattern.
The light is very easy to use with just a single button interface, and the light is surprisingly lightweight for its size.
Light Performance Test
Procedure/Setup
The light intensity is being measured with an Extech SDL400 light meter and datalogger. The lights and the light sensor are attached to various tripods that I already own and are held 1 m apart from each other. The datalogger is started, and the light is turned on and shone directly onto the sensor.
The test is conducted in a completely dark room with a fan running to ensure air is circulating over the light. The test runs continuously until the battery dies. The light is then recharged and retested for each steady light mode. For the flash mode, testing lasts about 1-2 hours.
Typically, flash modes are only for user visibility, so I’m not very concerned with the light intensity reduction over time as much as the steady mode.
For the full test setup and the benefits for this test setup, check out Light Intensity Test Setup with Extech SDL400.
Test Results
I am testing each constant light mode for intensity and duration. I currently don’t have any lights that are as bright or have similar battery sizes, but I will compare the results to one of my other bright lights. This comparison will give a good idea of how Outbound Lighting has designed its lights to have constant outputs for the cycle.
Also, I am plotting the data as perceived light as a percentage and is:
Perceived Light (%) = 100 x sqrt(Measured Light (%)/100)
where Measured Light (%) is the Current Lux/Maximum Lux x 100. For the perceived light calculation, the max lux is used for all light modes. For comparing multiple lights, the max lux from the lights being compared is used. In other words, the perceived light comparison is relative to the brightest light being compared.

The Outbound Lighting Trail Evo light intensity comparisons for all light modes.
Using the perceived light of the Outbound Lighting Trail Evo, it can be seen that that intensity reduces much more than the perceived reduction. With some lights, as the light intensity reduces, even with the battery draining, they can maintain close to 100% perceived light for a significant amount of time. Some lights leverage this principle of perceived light and reduce the intensity gradually to extend battery runtime.
Looking at the light intensity graph, even after three years of use, this light is outperforming all of the claimed runtimes. The high mode lasted for over two hours when the claimed runtime is 1.7 hours. And low mode performed an hour more than the claimed run time, whereas medium is really close and Adaptive mode lasted about 30 minutes more.
Interestingly, there is a large initial drop-off for Adaptive and High modes that isn’t captured on the Outbound Lighting graph. I’m assuming that these first 15 minutes or so aren’t being considered in the test data. After that point, the High mode flattens off and remains relatively constant, whereas the Adaptive mode does its programmed tapering off.
What also can be noted is that Adaptive at startup is 100%, but when the light is switched to High, the light is brighter. But at 15 minutes, the two intensities intersect. This may be another reason why the first 15 minutes of data aren’t included.
Since there is an initial 15 minutes of higher intensity, the graphs aren’t matching up to the data that Outbound Lighting shows for the Trail Evo. Based on this data, the high mode is about 88% of the initial intensity. The Medium and Low modes match well, but not quite at the same percentage.
Apart from the initial 15 minutes, the trends match up well.

The Outbound Lighting Trail Evo perceived light intensity comparisons for all light modes.
With the first 15 minutes removed from the tests, the runtimes are a little bit closer, but still outperforming the claimed times. The High and Adaptive modes match a lot closer, but the intensities for the Mid and Low are higher than what is claimed.
Basically, the Outbound Lighting Trail Evo handlebar light, after three years of use, performs better than the official posted times, and the intensities are better too.

The Outbound Lighting Trail Evo perceived light intensity for all light modes w/ first 15 min removed.


Limitations
This test doesn’t consider the beam spread or throw. Thus, a light with a compact beam could perform very well in the light intensity testing but not be very useful for cycling. Fortunately, this light is designed for cycling and provides good lighting for trail-riding.
Beam Spread and Throw To evaluate the Outbound Lighting Trail Evo beam spread (how wide the light spreads) and throw (how far it projects), I conducted on-bike tests in a dark, rural environment, supplemented by wall projections at 3 meters. Unlike my Extech SDL400 intensity tests, which focused on lux at 1 meter, these observations assess real-world usability for cycling.
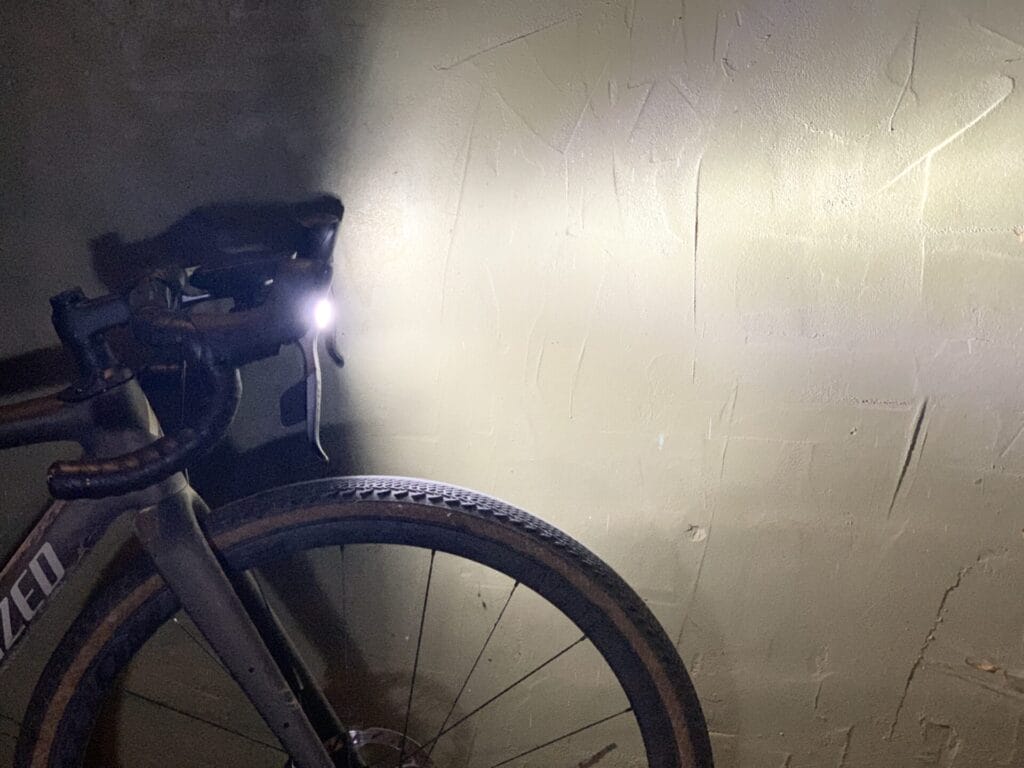
The Trail Evo light has nine LEDs and produces a wide beam of light. There is no central hotspot since the LEDs are aimed in a way to evenly spread the light over this wide pattern.
The beam pattern provides a lot of light right in front of the bike (assuming the light is mounted on a flat bar bike). This allows for perfect visibility of the trail right in front of the bike, which is essential for technical trails.
The throw of the light easily gives 50 feet ahead on clear open trails. And the wide pattern lights up the trail very well even on sharp turns.
Things I Would Change
I wouldn’t say this light is perfect, but it is close to it. I only say this because this light was released five years ago and is lacking newer technologies that other competitor brands are adding—mainly, Bluetooth connectivity. This would allow one to control their light with their cycling computer or a remote or via an app.
I think Outbound Lighting could take their lights to the next level with technology. This could also allow for firmware updates.
Things to Improve Trail Evo:
- Add Bluetooth connectivity.
- Add remote to control light.
- Develop app to change light modes.
- Change the shape of the charge port opening.
- Add a lockout mode.


Final Thoughts
Don’t sleep on this light. The Outbound Lighting Trail Evo light is USA-made and probably one of the best lights on the market. The beam pattern is probably second to none. This all-in-one light is very bright and has a great runtime.
Based on my testing, even after three years since new, the Trail Evo is outperforming the claimed runtimes. Most lights on the market can’t do that.
As mentioned above, FL-1 testing is really a poor way to design a light; that’s why you won’t find an FL-1 rating. Outbound Lighting wants a light that is going to perform consistently over the battery cycle. I can confirm that this has been achieved.
Based on my testing of lights, the light output over time is the most impressive of all lights I have tested. I’m not saying all other lights on the market are bad (some are); just none have performed like this one has.
I can’t recommend this light highly enough. Outbound Lighting customer service is extremely nice and very prompt to respond. I have even chatted with one of the owners.
The light is relatively lightweight, and the mount is very secure. The light doesn’t wiggle around in the mount even on the bumpiest trails. With a single button interface, the light is very easy to use too.
For trail riding or gravel riding, this is my favorite light. The Trail Evo is very bright, and with a large flood beam pattern, it will blind oncoming road or cycle path users. It isn’t designed for road cycling, so I wouldn’t recommend it for the previously mentioned reason.
If you are going to be doing overnight races, bikepacking/touring trips, or long night rides, you are going to want this light. With its pass-through charging capabilities, you can get a few external power banks and run this light all night.
Like I said, without hesitation, I highly recommend this light, and it is the best light on the market for off-road riding.


Author Conflicts
I purchased the Outbound Lighting Trail Evo light with my own money. I did not receive any compensation from Outbound Lighting to review this product. Though I did have conversations with Tom at Outbound Lighting, and I sent over some initial graphs, they were not involved with the information in this article (before or after). This product was reviewed on my own accord to provide information about the product and hopefully give readers useful information to help guide their decision in purchasing these products.
I receive no compensation if you purchase this light. The links to Outbound Lighting are non-affiliate links.
SUPPORT JAYLO CYCLING
Did you find this post useful? If you have any questions, feel free to leave a comment below. If you have any suggestions of reviews or things you would like to see in the future contact me. My reviews are thorough and often take a significant amount of time to produce.
Please consider checking out my Instagram, YouTube, and Facebook accounts to show me support there. If you feel generous and have the ability, consider buying me a coffee to help support this site. Thank you for taking the time to check out my website and don’t forget to Subscribe to my newsletter too.