The Magicshine Hori 900
Magicshine has entered the Garmin quarter-turn style mounting light market with the Hori-series lights. This is just a review of the Hori 900. If you are interested in a dual beam light and a bit more power, check out the Hori-1300.
I am quite fascinated with this style of light though it does have some downfalls that I will address and ways around them. The mounting problem is specifically addressed in a way to improve visibility and adjustment.
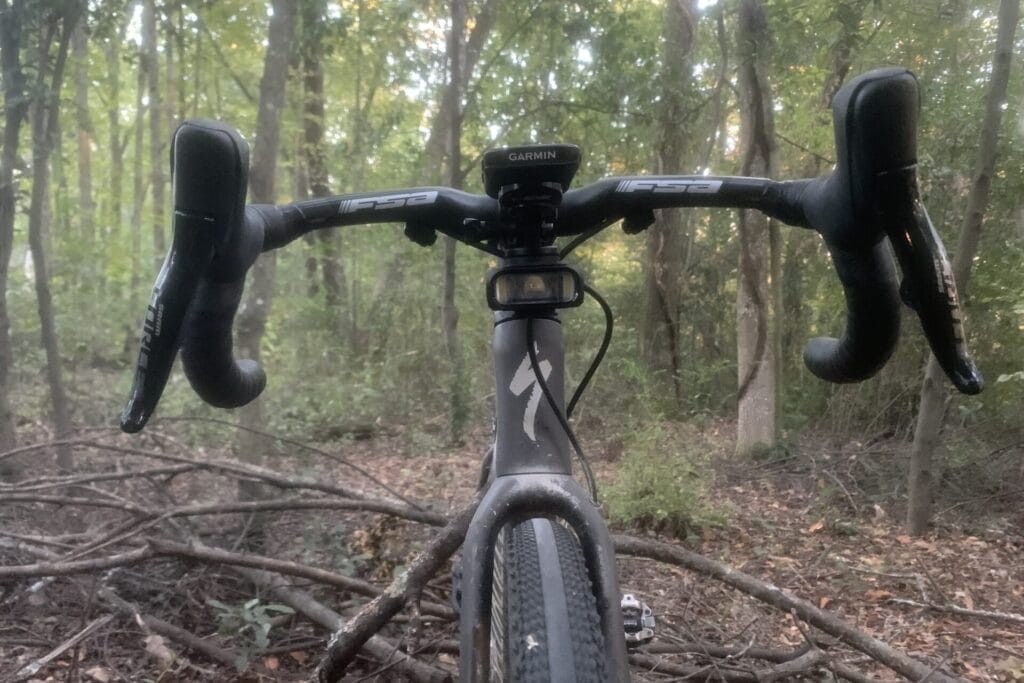
This style of light is quite interesting mainly because of the mounting, in that they are using the commonly used Garmin quarter-turn that has been around for years. Most people have out-front mounts on their handlebars, so additional mounts aren’t needed to use this light.
If you have a Garmin or KOM Cycling out-front mount, this light can be installed either on top or underneath the mount without the need for an adapter (though I still recommend one, see below).
Unboxing
The Magicshine Hori 900 dual mounted bike light comes with the main light body, a detachable Garmin Base (male quarter-turn), a Garmin and Wahoo mount (female quarter-turn base), a decorative cover, a GoPro adapter, USB-A to USB-C charging cable, torx key, and a User Manual.
The Base and mount are attached with a screw through the mount and into the light body. There is also a piece of 3M tape to help keep it attached. The attachment base and mount are interchangeable in that they can be installed on the top or the bottom of the light depending on how the light will be attached.
My Magicshine Hori 900 came with the Garmin mount installed on the top of the light and the Garmin base on the top side. I assume this is how all lights will come from the factory; if not, it is easily reversible.
The Hori 900 does not come with an out-front mount or the remote control. I’m not saying Magicshine is listening or reading my reviews, but this is something I mentioned in a previous review. I know most people have mounts on their bikes, so keeping the mount optional as an add-on while keeping the cost lower without it is a great move.
Not that there is anything wrong with the mount, I just don’t need it anymore and like having the option of not having it included with the light.
The remote is a nice feature of this light, and it is a must if you want to access all the light modes; otherwise, it isn’t absolutely necessary and nice that you can opt out of the remote too.


Warranty
For bike lights, there is a 2-year warranty, but if the light was purchased from an authorized dealer, the coverage is extended an additional 6 months. Make sure to have your order number and proof of purchase for your warranty claim. Batteries and accessories have 1 year of coverage.
Price
The Magicshine Hori 900 alone initially retailed for $59.99 USD, but dropped to $42.50 USD.
With the remote it is $79.98 USD
The out-front mount is an additional $10 USD
Originally it was about $0.07/lumen, but at the new price it is $0.05/lumen. This new price puts the light on par with the Evo 1700 in terms of cost.


The Light
The main body of Magicshine Hori 900 is made from aluminum; it also has composite plastic and a rubber button located on the side of the light. The light has three different LEDs: two at the edges and the main LED. The two edge LEDs are the DRL (Daytime Running Light), and the main LED is located at the center of the lens.
The DRLs are meant to boost visibility and operate independently of the main light. This allows for a constant main light and flashing from the DRL. The main light is designed with a cut-off lens so as not to blind oncoming traffic.
Specs
- Max Output: 900 Lumens
- Light Source: High-power LEDs
- Runtime: 1.5-30.5 hours
- Charge time: 2.5 hours (5 V 1 A)
- Battery: 3.7 V 2000 mAh
- Charge Port: USB-C
- Water Penetration: IPX6
- Weight (mass): 3.77 oz (107 g)
- Size: 58x50x32 mm
Light Modes
The Magicshine Hori 900 comes setup with 7 light modes, though with the app the light modes can be customized to the user’s preference. The modes are Main Light & DRL, DRL, and Flash. Within the Main Light & DRL Mode, there is High, Medium, and Low. For the DRL Mode there are Constant and Hyper Flash, and the Flash Mode has Day Flash and Night Flash.
To access all of the light modes, specifically the flash modes, the remote is needed.
Charging/Discharging
The Magicshine Hori 900 has a USB-C charge port with a rubber cover that protects the port from water intrusion during use. It takes about 2.5 hours to charge the light at 5 Volt 1 Amp. The light has a relatively small battery, but this is how they were able to keep the light so compact and lightweight. Depending on the light mode the light will last between 1.5 to 30 hours, but this will be tested below.

Light interface and Magicshine App
The Magicshine Hori 900 light is initially in Lockout Mode when it first arrives. This is shown when the button is clicked and the red light on the button flashes for three seconds. To exit or enter this mode, press and hold the power button for three seconds.
Once out of Lockout mode, press and hold the power button for one second to turn it on. Click the power button to scroll through the light settings. To move between Flash and Constant mode double click the power button.
When the light is on, the power button will be lit to indicate the battery level. The light indicator on the power button for the battery level will show: Green – 100-21%, Red – 20-11%, and Flashing Red – 10-1%. The battery level can be accessed while the light is off too by clicking the power button (the same level mentioned previously will show when the button is clicked).
If you want ultimate control of the Magicshine Hori 900, you will want to use the Magicshine App. Connecting to the app is very easy and once connected you can adjust the brightness by 1% increments. You can switch between light modes and save custom settings.
Don’t expect a lot of people to use the app, so I won’t delve too deep into it. But it is still worth mentioning, because you will need the app to access the SOS feature and to upgrade the firmware.
Full details on downloading and connecting to the device and more can be found on the Magicshine App User Manual.
The last and possibly the best/most efficient way to use the light is with the wireless remote. The remote has two buttons, one marked with a square and the other with a circle. The remote allows you to quickly change between modes and brightness levels, power on and off, and go into flash mode.
For full details, check out the Magicshine Hori 900 User Manual.
The Magicshine remote is now smaller than before. Also, it no longer uses a coin cell battery; it is rechargeable using a USB-C cable. The remote will also indicate the battery life of the light unit and the remote. This remote allows you to connect to multiple lights too (more below).


Remote Control
Using the remote control gives you a few extra features than only operating the light with the power button on the light. The remote allows you to switch to the brightness mode quickly by pressing the square button. Double clicking the square button gets you into the flash modes.
Pressing the circle button scrolls through the light modes. Double clicking the circle button switches between Main Light + DRL to DRL only.
Pairing the remote is very simple; see manual for full details.
FTR LightSync Control
This feature is available with the Magicshine Hori 900. This feature allows the light to be paired to the remote control and a Magicshine taillight at once. With the remote connected to the lights, both are controlled by a single click of the button.
Mounting
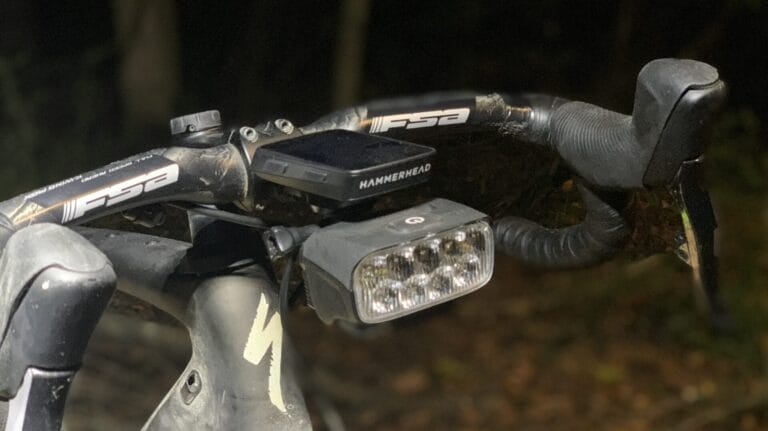
This is probably the easiest light to install, especially if there is already an out-front mount on the bike. This light is installed exactly like installing a quarter-turn cycling computer. This assumes the light is being installed on the top side of the mount.
Installing underneath the mount will depend on the type of mounting connection that is on the mount. Typically, it will be a GoPro underneath, and the GoPro adapter can be used. If using a Garmin or KOM Cycling mount, the light can be mounted directly.
Note that the main light beam pattern is directional in the sense that the Magicshine Hori 900 light needs to be installed upright. If the light is installed upside down (can be seen installed incorrectly on Magicshine advertising) the cutoff light will be pointing in the wrong direction. Make sure to switch out the mounting plates so that the light is installed properly.


Initial Thoughts
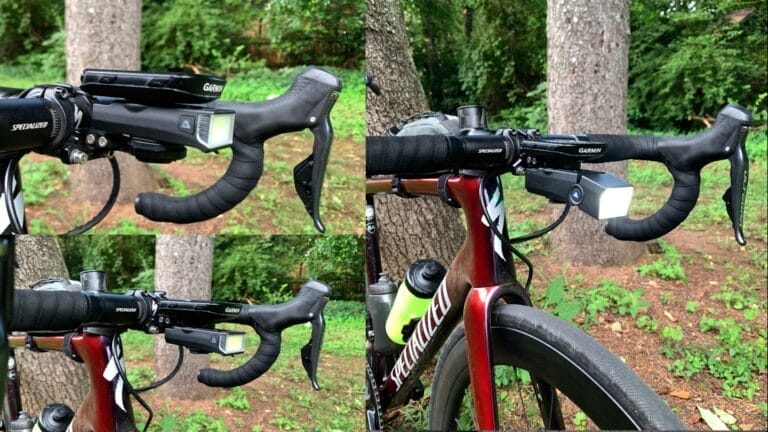
When I first saw this style of light from Ravemen (FR160), I was quite fascinated. I love the simplicity of this style of mounting since it can be placed right under a cycling computer. This keeps the GoPro mount below available for mounting other objects.
The big difference with the FR160 is that it is just meant for visibility and direction that the light points isn’t crucial. The Hori 900 does require it to be adjusted so it functions properly as a main light. Therefore, installing the light on the top of an out-front mount, in my opinion, isn’t advised. I discovered this when testing out the KOM Cycling Quick Release 1000 lm & 350 lm lights.
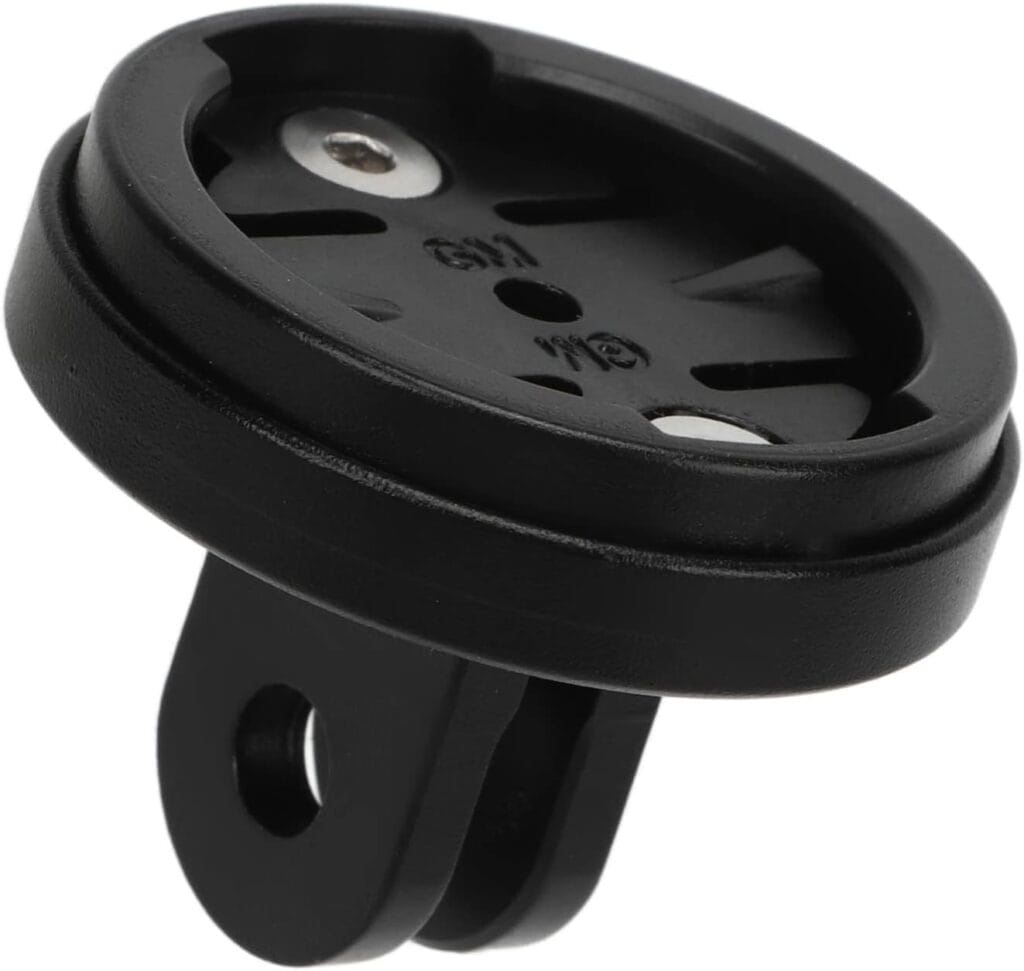
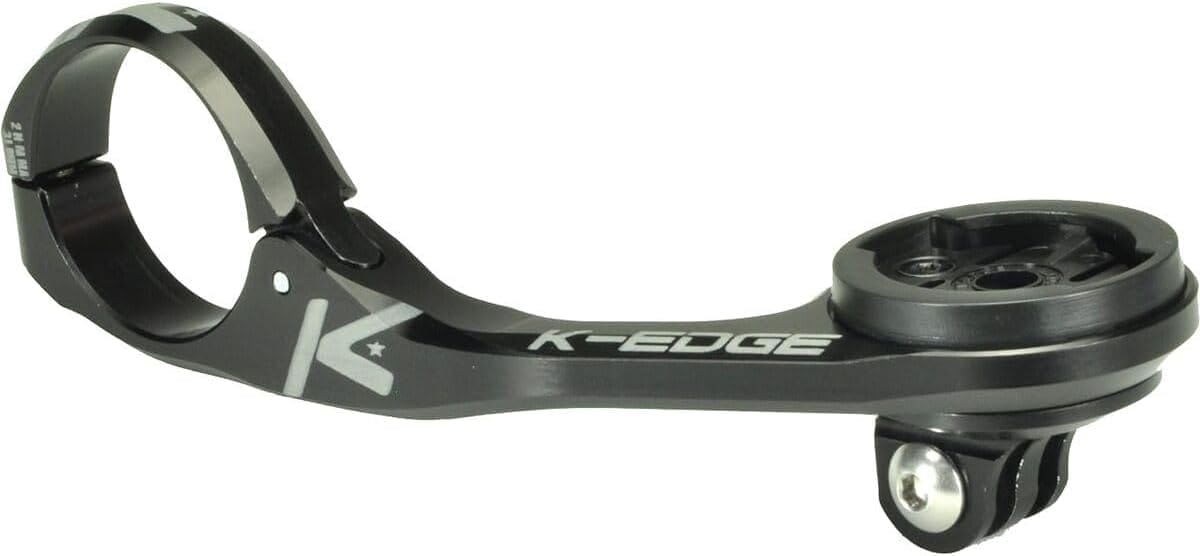
No worries, use the provided GoPro adapter, or adapter shown below to get the perfect adjustment.
I like the shape of the light. It is quite low profile and it is a sleek light. I am eager to see how it performs.


Light Performance
Procedure/Setup
The light intensity is being measured with an Extech SDL400 light meter and datalogger. The lights and the light sensor are attached to various tripods that I already own and are held 1 m apart from each other. The datalogger is started, and the light is turned on and shone directly onto the sensor.
The test is conducted in a completely dark room with a fan running to ensure air is circulating over the light. The test runs continuously until the battery dies. The light is then recharged and retested for each steady light mode. For the flash mode, testing lasts about 1-2 hours.
Typically, flash modes are only for user visibility, so I’m not very concerned with the light intensity reduction over time as much as the steady mode.
For the full test setup and the benefits for this test setup, check out Light Intensity Test Setup with Extech SDL400.
Testing
I tested each constant Main Light mode and the Constant DRL for intensity and duration. I also tested Night Flash mode for about 2 hours to see how the light performs over a short period of time. Then the Magicshine Hori 900 is compared to a few other lights with similar claimed lumen ratings.
Also, I am plotting the data as perceived light as a percentage and is:
Perceived Light (%) = 100 x sqrt(Measured Light (%)/100)
where Measured Light (%) is the Current Lux/Maximum Lux x 100. For the perceived light calculation, the max lux is used for all light modes. For comparing multiple lights, the max lux from the lights being compared is used. In other words, the perceived light comparison is relative to the brightest light being compared.

Test Results
The Magicshine Hori 900 hit all of the claimed runtimes. I would say though, the High runtime is a bit exaggerated. There is a huge drop in intensity before the 1:15 mark and around 500 lux for the last 20 minutes, which is about the same intensity the Low mode is its last three hours.
Mid mode ran quite a bit past the claimed runtime of 2.5 hours even before its last drop in intensity. Low mode ran more than 5 hours though the claimed runtime is 3.5 hours.
I’m not sure why Mid and Low are quite different, unless they were tested at different brightness (which can be changed within the app). Typically, from other lights I’ve tested, Mid mode is around 50% and Low is about 25%, but the Hori 900 is defaulted to lower.

Hori 900 All light modes intensity comparison.
Looking at the combined perceived plot, the High mode drops to about 85% of full intensity within 2.5 mins, then stays constant for a little, then tapers down to about 75% until around the 1:15 mark and finishes off at around 35%. The first drop off is a bit common with many lights, and this isn’t the best I’ve seen from Magicshine.
The Mid mode starts off at 75% for about 2.5 mins then tapers down to 50% at around the hour mark before dropping down to about 35% before cutting off. The low mode starts off just below 55% for 5 minutes then saunters down to 35% for the remainder of the test.
This is about 25% drop-offs for the High and Mid modes and about a 15% drop-off.

Hori 900 perceived intensity all light modes.
To get an idea of how the Hori 900 performs I am comparing it against two other lights of similar lumen ratings. C1 is an older light with a single LED with a round lens of about 500 lumens. C2 is a light set on the low beam and has 1000 lumens (claimed).
C2 has a much larger battery so it is expected to last longer than either light, but the Hori 900 and C2 are similar. Looking at the performance the lights perform quite similarly, the Hori has a steep initial decline but levels off near the other lights. C2 stays quite constant for most of the test then declines slightly as it dies.
C1 is an older light that has quite a bit of use and still lasts a bit longer, and though it has a lot lower claimed lumen rating it has a higher intensity for quite a bit of the test. C1 also lasts longer too.
For the Mid mode, both lights perform better than the Hori 900, though the Hori 900 is quite brighter initially. C1 has a slightly bigger battery of 2800 mAh. Low Mode is quite similar to the Mid mode but the Hori 900 is under the C1 the entire test.

High mode comparison of Hori 900 to two similar competitor lights.

Hori 900 perceived light comparison between two other lights.

Hori 900 comparison to two other competitor lights on Mid mode.

Hori 900 compared to two other lights in all in Low mode.
The last test is the DRL mode. This test ran for about 19 hours, but the claimed runtime is 7.5 hours. I’m not sure where the discrepancy is, but it performed way better than claimed. Similar to the other modes, the Hori 900 starts out brighter then drops down midway during the test.

Hori 900 DRL light mode light intensity test.


Limitations of this Test
The lux meter test doesn’t consider the beam spread or throw of the light. Thus, a light with a compact beam could perform very well in the light intensity testing, but not be very useful for cycling. Fortunately, this light has been designed for cycling and provides good lighting for cycling.
Beam Spread and Throw
To evaluate the Magicshine Hori 900 beam spread (how wide the light spreads) and throw (how far the light projects), I conducted on-bike tests in a dark, rural environment, supplemented by wall projections at roughly 3 meters. Unlike my Extech SDL400 intensity tests, which focused on lux at 1 meter, these observations assess real-world usability for cycling.
The Hori 900 has a very similar beam pattern as the Magicshine Evo 1700 (which is probably my favorite road cycling light). Near the bike it has a square beam that shines a few feet away from the front of the bike, lighting up the area right in front. From there, the light tapers away, but with hard cut-off lines, making sure the light is effectively lighting the way.
At the top of the beam pattern there is a sharp cut off, when angled correctly lights up the way without blinding oncoming road users. The light is claimed to have 150 m of throw, but realistically, it has easily 75 feet of effective or useful throw (light that is lighting the road ahead). And really more than enough to light the road, even at higher speeds.
The good thing about this light is that it doesn’t have a hot spot, and it evenly distributes the light within the trapezoidal projected beam pattern. Light isn’t wasted shining high up where it isn’t needed, or far out wide either.
If running the DRLs only, this is a different story, since these lights are really only meant for the rider’s visibility there is no real need to worry about beam pattern or throw. It does light out the area right in front of the bike, so if riding in intermittently lit areas, the light will help you see things on the ground well, but mainly for slower speeds.
Of course, the beam pattern, throw, and spread assumes that the light is installed right side up and the light is properly adjusted, most likely with an adapter. Misalignment will reduce light effectiveness. These tests are subjective, and ambient light or road conditions may vary results, but the Hori 900 will make a good commuting light or light for group riding.


Adapters
Magicshine has smartly included a GoPro to quarter-turn adapter. This essentially makes the light perfectly adjustable if installed underneath. Typically, riders will set the out-front mount to be at their preferred angle, which most likely won’t be the ideal angle for a light. Some riders have it tilted downwards, and others tilted upwards.
This means when the Magicshine Hori 900 is installed directly to the out-front mount, the light will not be pointed in the optimized direction. If this light were just a blinky style light then this wouldn’t be an issue, but since it has a main light with a cut off pattern, the angle of the light is critical.
If you are using a Garmin or KOM Cycling out-front mount, then the underside of the mount has a male Garmin quarter-turn. To install the light to this mount, a Garmin to GoPro mount will be required.


Things I would Change
I’ve mentioned this before, and until it is changed, I will continue to mention it. The battery level indicator is too broad, specifically the green level (100-21%). I think a flashing green light should be added after the solid green and the ranges should be changed. The ranges could be as follows: solid green – 100-75%, flashing green – 74-50%, solid red – 49-25%, and flashing red – 24-1%.
I feel like the GoPro Adapter feels a bit cheap. Though I haven’t had any issues with it, I’m worried it will break in the long run. Most likely I will just stick with an aluminum adapter.
Don’t include a USB cord anymore. If the cord isn’t USB-C to USB-C, then I don’t want it. In fact, most of the provided cords are so short and thin, they are practically useless.
Final Thoughts
The Hori 900 is Magicshine’s first dual-mount Garmin style light, and is following suit with other lights from Ravemen and KOM Cycling. This style of light has many benefits, typically being lightweight and easy to install, but they aren’t the end all light.
Knowing their limitation is important when picking out the right light for the style of riding one is doing. In fact, I think most people should have a variety of lights depending on different conditions and needs.
Commuting and riding slower speeds, one doesn’t need as bright of a light. Trail riding doesn’t require a cut-off beam. Gravel is a bit similar to road, but sometimes one is quite rural and will need a brighter light. A light with dual beam (high/low beam) is ideal for this.
The Hori 900 doesn’t have the best light intensity performance when comparing it to other similar lights. This doesn’t mean it is a bad light though. I believe this light has a very good beam pattern and it has a much better beam pattern than C1 and C2. The beam pattern is where the Hori 900 excels.
The shape of it and how it directs the light where the rider needs it makes it perfect for commuting and road cycling. I don’t think I would recommend it for off road riding, unless if it was combined with a helmet light or used as supplementary light to another handlebar mounted light.
Paired with the remote and having an app for customization makes this a solid light. If you are looking for a low-profile lightweight light that is easy to install, this should be a light to consider.


Author Conflicts
I recieved the Magicshine Hori 900 through a Facebook giveaway on the Magicshine group. I did not receive any compensation from Magicshine to review this product. This product was reviewed on my own accord to provide information about the product and hopefully give readers useful information to help guide their decision in purchasing these products.
Support Jaylo Cycling
Did you find this post useful? If you have any questions, feel free to leave a comment below. If you have any suggestions of reviews or things you would like to see in the future contact me. My reviews are thorough and often take a significant amount of time to produce.
Please consider checking out my Instagram, YouTube, and Facebook accounts to show me support there. If you feel generous and have the ability, consider buying me a coffee to help support this site. Thank you for taking the time to check out my website and don’t forget to Subscribe to my newsletter too.